Green Tea & Honey French Macarons Recipe. (My first try with this recipe.)
Other recipes and pictures:
Lavender Vanilla Macaron Recipe
Chocolate Raspberry Skyr Macaron Recipe
Orange Blossom Macaron Recipe
Rose Vanilla Elderflower Macaron Recipe
Eggnog with Cinnamon & Nutmeg Macaron Recipe
Vanilla-Ginger Macaron Recipe
Snickerdoodle Macaron Recipe
Lavender Vanilla Macaron Recipe
Chocolate Raspberry Skyr Macaron Recipe
Orange Blossom Macaron Recipe
Rose Vanilla Elderflower Macaron Recipe
Eggnog with Cinnamon & Nutmeg Macaron Recipe
Vanilla-Ginger Macaron Recipe
Snickerdoodle Macaron Recipe

A recipe blog post today instead of a new crochet pattern!
My daughter's birthday is coming up and I thought I'd surprise her with her favorite cookie: The French Macaron. (These are the delicious fluffy sandwich cookie made with almond flour that is crunchy on the outside & chewy on the inside with a light layer of icing, ganache or buttercream between shells. Not Macaroons that are made with coconut.) The cookies are often very expensive and hard to find. So, I thought I'd try my hand at baking some for her upcoming birthday.
I experimented with one recipe, but the buttercream frosting with egg yolk was overwhelming and much too rich for our liking. Plus, I ground the almonds myself and I think the ground almonds were still too coarse for the recipe. The cookies didn't come out quite right. We ate a few of them, but discarded them. They were just not worth the calories given that they only slightly resembled the delicious delicate French treat!
I blamed the first finicky batch on the weather and the less than ideal recipe & ingredients. Half of the mixture is meringue-based after all and you know my feelings about making meringue on humid days. (Avoid it if at all possible!) Well, the same holds true for French Macarons. You really need a nice dry day for these finicky, yet delicious, morsels!
So after the rainy weather passed, I chose to try modifying another recipe in order to use the chocolate that I had on hand. I made cocoa flavored macarons with a dark chocolate ganache filling. They were delicious, but a little smaller than I would have liked. Plus, I don't think I folded the mixture long enough because they didn't self-level as much as I expected them to. They turned out more like round cream puffs. They tasted good once they were cooled, but the shape was still not the macaroon shape with the distinguishable raised shell over the 'feet' of the cookie.
So, I waited a few more days until more bad weather passed and decided to use the dry day to try another recipe. Our household drinks a lot of tea. So, I had matcha green tea powder on hand. One of our favorite drinks is green tea with honey. So, I thought I'd make Green Tea Macarons with a light Honey Buttercream filling. I used actual Matcha Green Tea Powder from Japan. It's more of a ceremonial grade than a cooking grade matcha. (The taste is better, in my opinion.) You can find cooking grade matcha that is much brighter green. (If so, you can avoid using additional food coloring.)
We are also obsessed with honey. We love trying new flavors. The most recent puchase was a Tasmanian Leatherwood Honey that is absolutely incredible. It has a sweet, herbal, woodsy flavor that is nothing like traditional honey. It's thick and creamy too, so it was the perfect choice to add to the filling.
Here's what I did:
Green tea and honey French Macarons
The dry ingredients:
90g powdered sugar
90g super fine almond flour (I used Bob's Red Mill Super-Fine Almond Flour)
1-2 tsp matcha green tea powder (I used Japanese Maeda-en Green Tea Powder)
(Note that matcha has caffeine, so use less if you are making for young kids or are sensitive to caffeine.)
Pinch salt
The meringue ingredients:
2 egg whites
1/4 tsp cream of tartar or 1/2 tsp white vinegar
1/4 cup granulated sugar
1 tsp vanilla (optional)
Matcha Honey Buttercream Filling (The recipe makes enough for a thin layer of filling. Double the recipe for thicker layer as desired.)
4 tbsp softened unsalted butter
4 tbsp softened unsalted butter
1/4 c powdered sugar
1 tbsp milk or cream
1tsp thick creamy honey ( I used Tasmanian Leatherwood)
The recipe made about 18-20 large macarons (36-40 shells). If you choose to make smaller ones, you can probably squeeze out about 24-26 complete macarons (48-52 shells).
(Pictures are provided below.)
In a large mixing bowl, sift together the first 4 ingredients: powdered sugar, almond flour matcha and salt. Set aside.
Make the meringue mixture: Put the egg whites into a spotlessly clean large mixing bowl. Add the cream of tartar (or vinegar) and vanilla. With stand (or hand) mixer on high, beat the egg white mixture until foamy. Continue to beat on high speed as you slowly add the granulated sugar. Do a tsp at a time, let the sugar get mixed in smoothly and then add another tsp. Continue adding sugar slowly while beating on high for about 5 minutes the meringue is glossy and stiff peaks have been created.
Sprinkle 1/3 of the dry mixture atop the meringue. With rubber spatula scrape the bowl in clockwise direction and cut down through half the mixture as you gently fold the dry ingredients into the meringue. The meringue will deflate slightly. When the dry ingredients are folded in smoothly, add another 1/3 of the dry mix on top of the wet mix. Fold in gently until no additional dry mix is visible. Add the last 1/3 of the dry mix. Fold into the meringue mixture. Do not over fold. Fold the mixture until the mixture runs off the spatula in a sticky ribbon. Test a spoonful on a plate. You want the mixture to self level in about 15-20 seconds. The folding process takes about 3-4 minutes. The mixture should look a little like cake batter. Add the green food coloring (if desired) and fold until desired color is achieved.
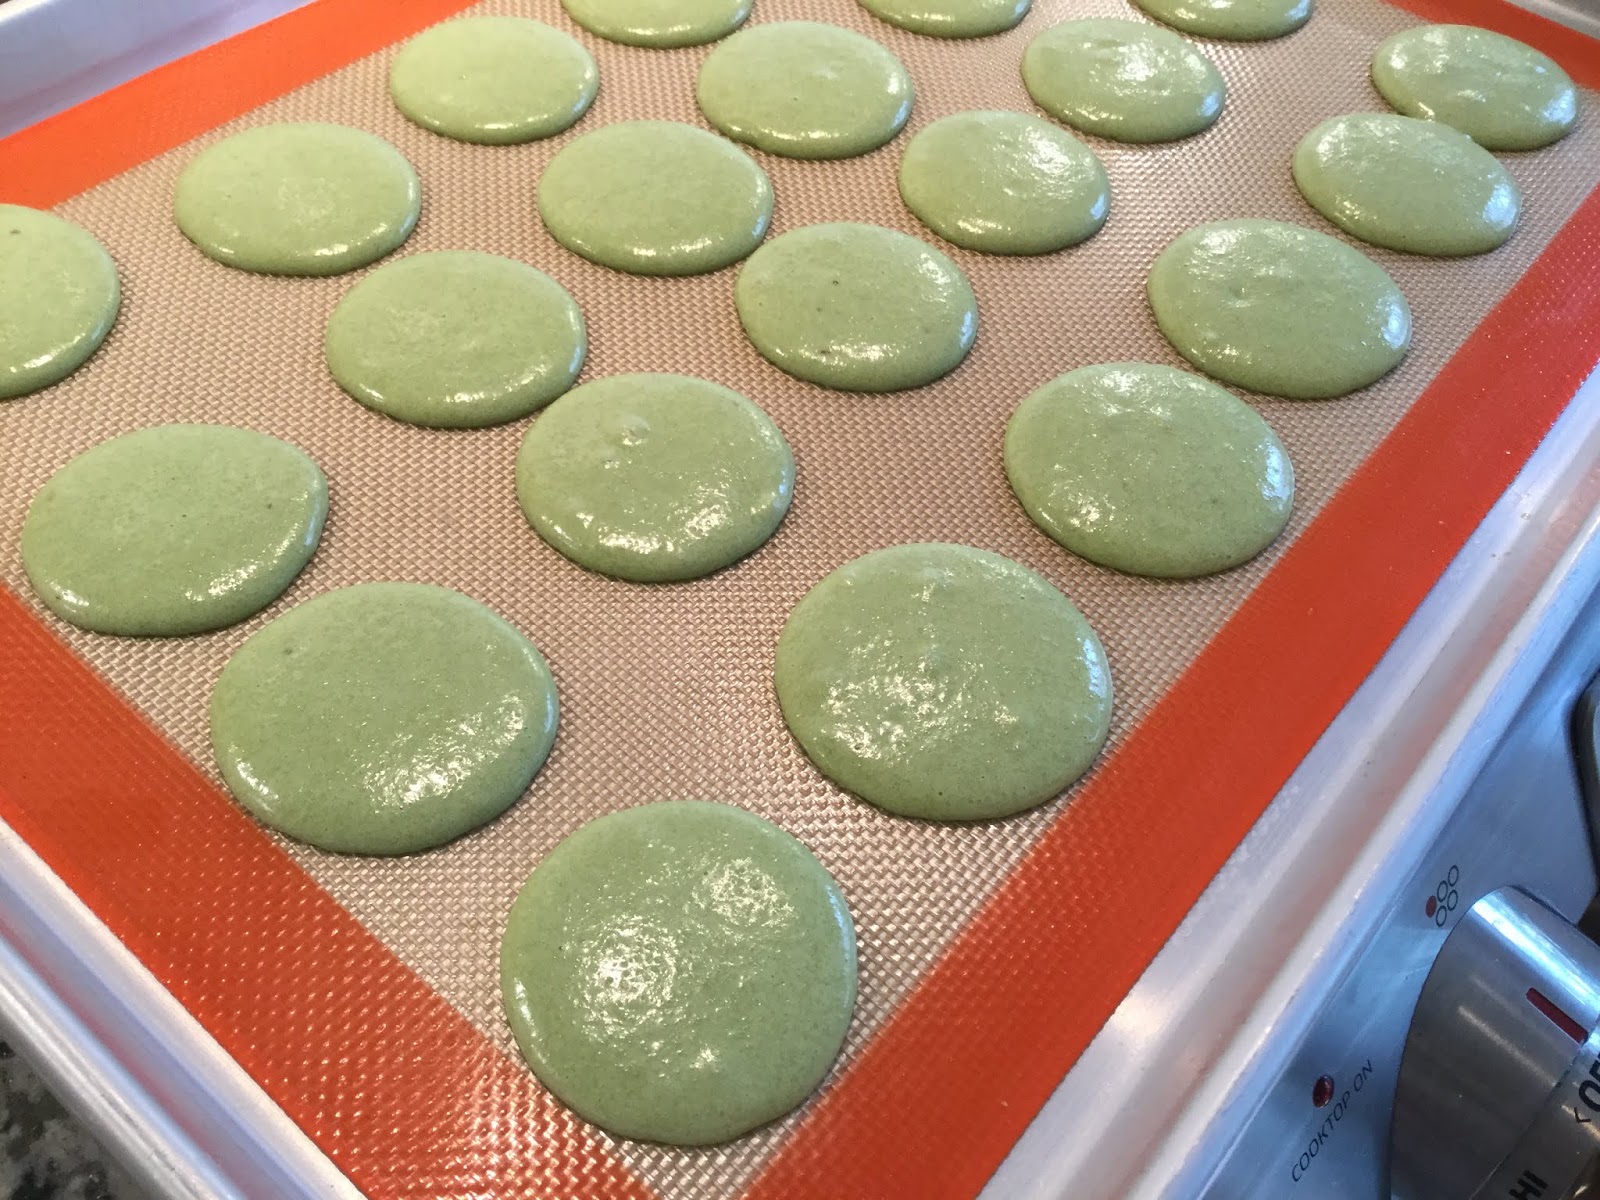
Add the mixture to a pasty bag with round tip. Squeeze out round cookies that are about 1.25 inch in diameter. (There are silicone mats with templates preprinted on them or see below) Tap the tray firmly and evenly on the countertop twice to smooth out air bubbles. Leave on counter, or in dry oven for 30 mins-1 hr until they are no longer sticky. Touch them lightly. If no batter sticks to your finger, then they are ready to bake. On humid days, it may take longer than an hour to get to the correct baking stage. You may need to let them rest in a dry oven on humid days. If you bake the cookies too soon, you will not create the feet on the cookie that is such a distinguishable feature of the French macaron.
When they are no longer sticky to the touch, bake in center rack on a tray lined with a silicone mat or parchment paper at 315 degrees for 13-14 minutes. You might need more time if you made thicker, larger cookies. Place an empty cookie sheet on the top rack of oven to absorb some of the heat from the top of the oven and help prevent the tops of the macarons from browning too quickly. Check the cookies after 12 to make sure they aren’t browning too soon. Remove from oven and cool for about 15 minutes. They are done if they are easy to lift off the paper or mat after cooling.
Add the Green tea honey buttercream filling.
With whip attachment, whip the butter until fluffy. Add the powdered sugar and continue to whip. Finally add the milk and honey and whip until smooth and fluffy. Add the filling to a pastry bag with round tip and keep cool until ready to use.
When the macarons are fully cooled match up pairs of similarly sized shapes. Squeeze out a small amount of icing and place between two macaron shells. Don’t over fill the cookies. A thin layer is usually all that is needed in order to sandwich the cookie and still keep the shell light and crunchy while the center stays chewy.
Keep in fridge for up to a week. The cookies freeze well too!
Enjoy.
Pictures of the process:
 |
| The sifted dry ingredients |
 |
| The frothy egg whites for the meringue mixture. |
 |
| The meringue mixture after mixing on high for about 5 mins. |
 |
| Folding the dry mixture into the meringue mixture. |
 |
| Nearly ready. Fold until the batter drops off the scraper in a sticky ribbon. (This is the mixture before adding food coloring if desired.) |

Here's the picture after taking them out of the oven. They are the first batch that have the distinguishable crust and "feet" that you expect to see on a French Macaron. I expect that I will get better as I continue to make them. On the template that I used, I used the outer circle. They were bigger than I expected, but they are delicious! Next time, I intend to try the smaller circle so that the filling is easier to see when sandwiched together.
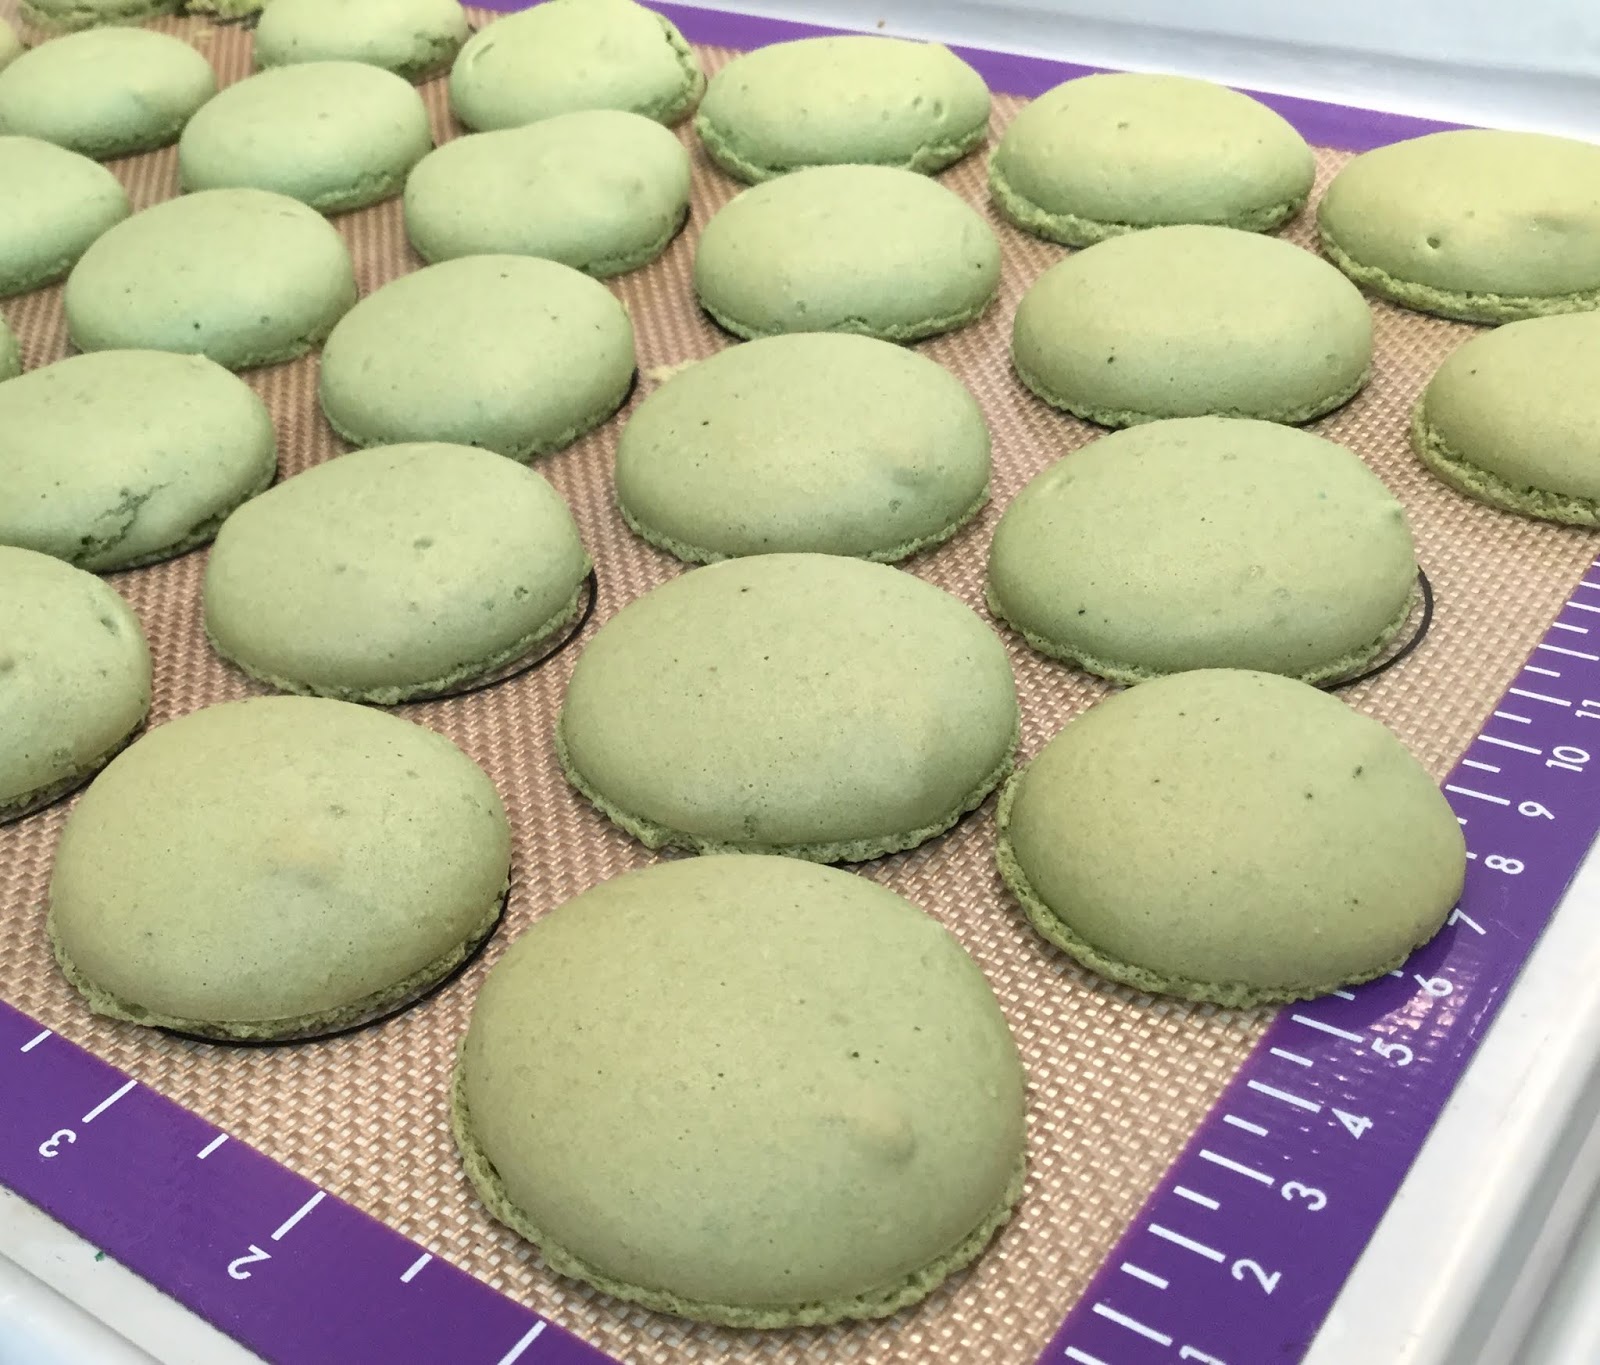 |
| After removing from oven. |
Overall, I am quite pleased with how they turned out. This is the first time using the recipe and the third try at making macarons.
--------
Materials Used:
These are the actual items that I used. You can use parchment paper in place of the silicone mats and you can use a plastic ziplock type bag in place of the pastry bag.
I participate in the Amazon Services Associates Program, an affiliate advertising program designed to provide a means for me to earn fees by linking to Online Shopping for Electronics, Apparel, Computers, Books & more, and affiliated sites.
I purchased the above items at full-price. I did not receive a discount or a promotional credit in exchange for my post. I'm simply linking to the items that I actually bought and used in this recipe in case others might be interested.
I purchased the above items at full-price. I did not receive a discount or a promotional credit in exchange for my post. I'm simply linking to the items that I actually bought and used in this recipe in case others might be interested.


Comments
Post a Comment